> ## Documentation Index
> Fetch the complete documentation index at: https://apidocs.mossx.ai/llms.txt
> Use this file to discover all available pages before exploring further.

# Codex 配置

### **一. 安装Codex**

#### **1.window安装Codex**

打开 PowerShell：按下 `Win+R`，输入 `powershell`，然后按回车。

在 PowerShell 中执行：

```text theme={null}
npm install -g @openai/codex@latest
```

这个命令会从 npm 官方仓库下载并安装最新版本的 Codex。

验证安装

```text theme={null}
codex --version
```

如果可以正常输出版本号，说明 Codex 已安装成功。

#### **2.Mac 安装 Codex**

打开“终端”：按下 `Command+Space` 打开聚焦搜索，输入“终端”或 `Terminal`，然后按回车。

在终端中执行：

```text theme={null}
npm install -g @openai/codex@latest
```

如果遇到权限不足，请输入 `sudo npm install -g @openai/codex@latest`，然后按提示输入密码。

验证安装

```text theme={null}
codex --version
```

如果可以正常输出版本号，说明 Codex 已安装成功。

#### **3.Linux 安装Codex**

打开终端，在终端中执行：

```text theme={null}
npm install -g @openai/codex@latest
```

如果遇到权限不足，请输入 `sudo npm install -g @openai/codex@latest`，然后按提示输入密码。

验证安装

```text theme={null}
codex --version
```

如果可以正常输出版本号，说明 Codex 已安装成功。

***

### **第二步：配置  CC GUI 中转站信息**

访问密钥管理页面：[https://fufei.mossx.ai/keys](https://fufei.mossx.ai/keys)

点击 密钥右侧的 使用教程：

<Frame>
  <img src="https://mintcdn.com/docs-api/IvMsdhdr8g643q_Z/images/ScreenShot_2026-08-21_132706_033.png?fit=max&auto=format&n=IvMsdhdr8g643q_Z&q=85&s=2a82a3650a079ab82eb80a1cc70d991a" alt="Screen Shot 2026 08 21 132706 033" width="2688" height="176" data-path="images/ScreenShot_2026-08-21_132706_033.png" />
</Frame>

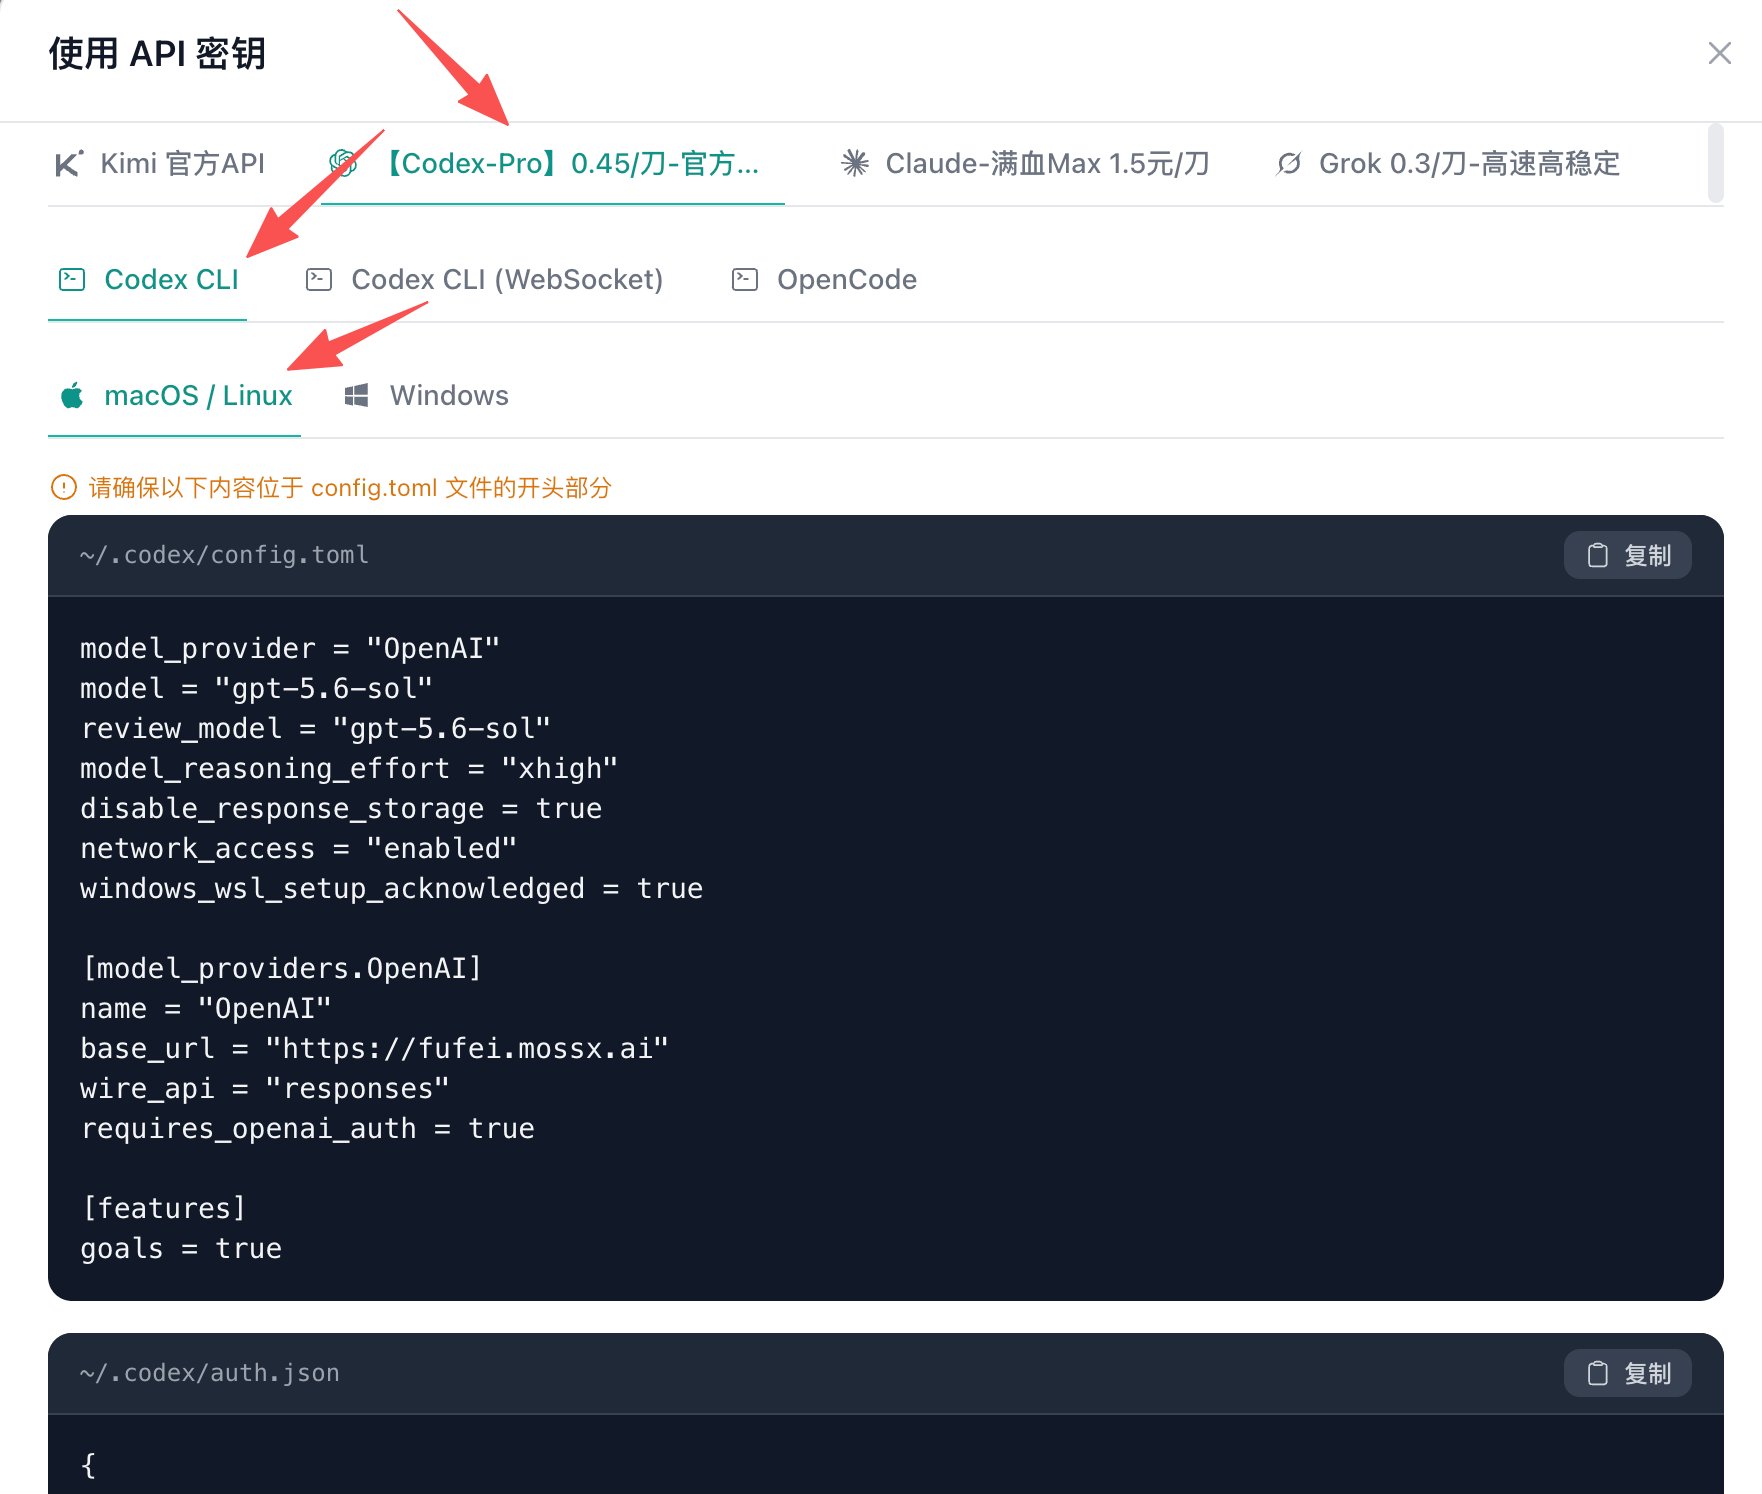
根据这里的教程，选择对应的平台 会有对应的教程

完全更换 下面两个文件的内容，即可配置完成（其他配置也根据教程来）

* \~/.codex/config.toml
* \~/.codex/auth.json
<Frame>
  <img src="https://mintcdn.com/docs-api/IvMsdhdr8g643q_Z/images/ScreenShot_2026-08-21_132726_410.png?fit=max&auto=format&n=IvMsdhdr8g643q_Z&q=85&s=cabc2538453f38231305f458f4aa4b12" alt="Screen Shot 2026 08 21 132726 410" width="1762" height="1494" data-path="images/ScreenShot_2026-08-21_132726_410.png" />
</Frame>

***

#### 使用Codex CLI

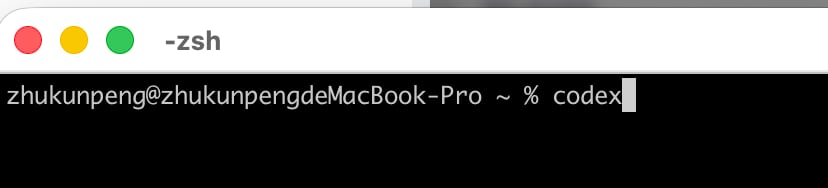
上面配置完成之后，直接终端启动codex，即可进行对话

<Frame>
  <img src="https://mintcdn.com/docs-api/IvMsdhdr8g643q_Z/images/ScreenShot_2026-08-21_132813_925.png?fit=max&auto=format&n=IvMsdhdr8g643q_Z&q=85&s=8b0fbaf6d23b01cbecf9ea18ee82af4d" alt="Screen Shot 2026 08 21 132813 925" width="828" height="188" data-path="images/ScreenShot_2026-08-21_132813_925.png" />
</Frame>

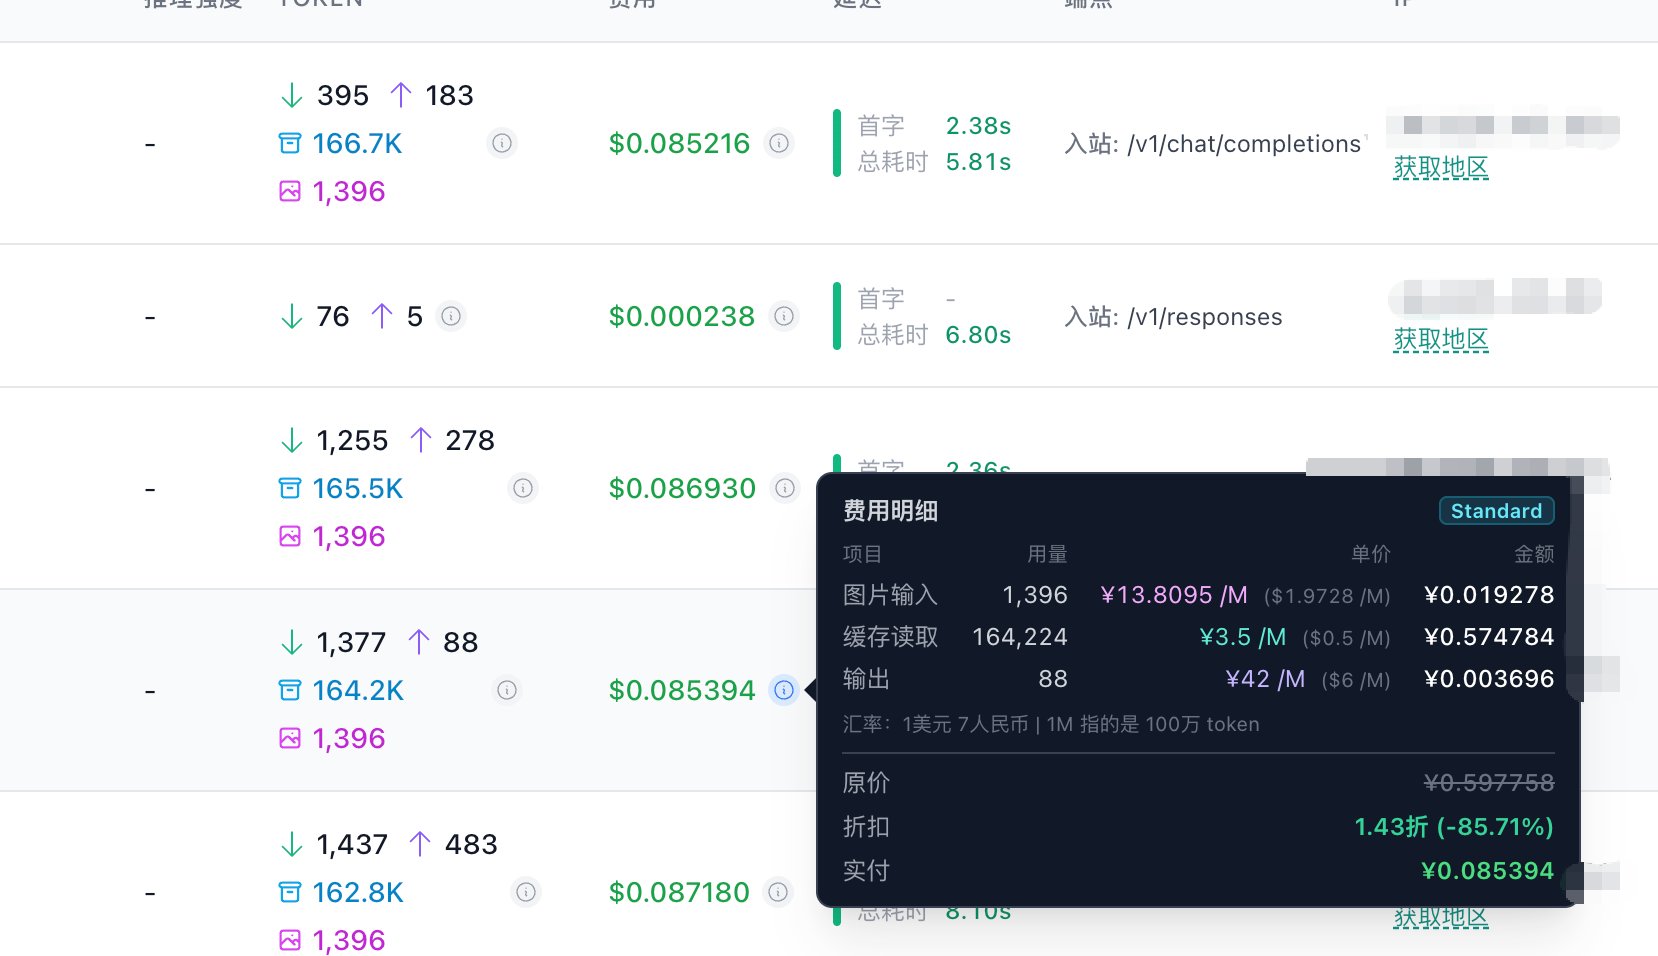
并且可以访问：[https://fufei.mossx.ai/usage](https://fufei.mossx.ai/usage)

查看自己刚刚请求的扣费情况
<Frame>
  <img src="https://mintcdn.com/docs-api/PwEYLgoL0kxVdcuq/images/image-10.png?fit=max&auto=format&n=PwEYLgoL0kxVdcuq&q=85&s=5f0843ea30bfc5304f12c820fb9ce271" alt="Image" width="1658" height="956" data-path="images/image-10.png" />
</Frame>

***

### 使用Codex 客户端

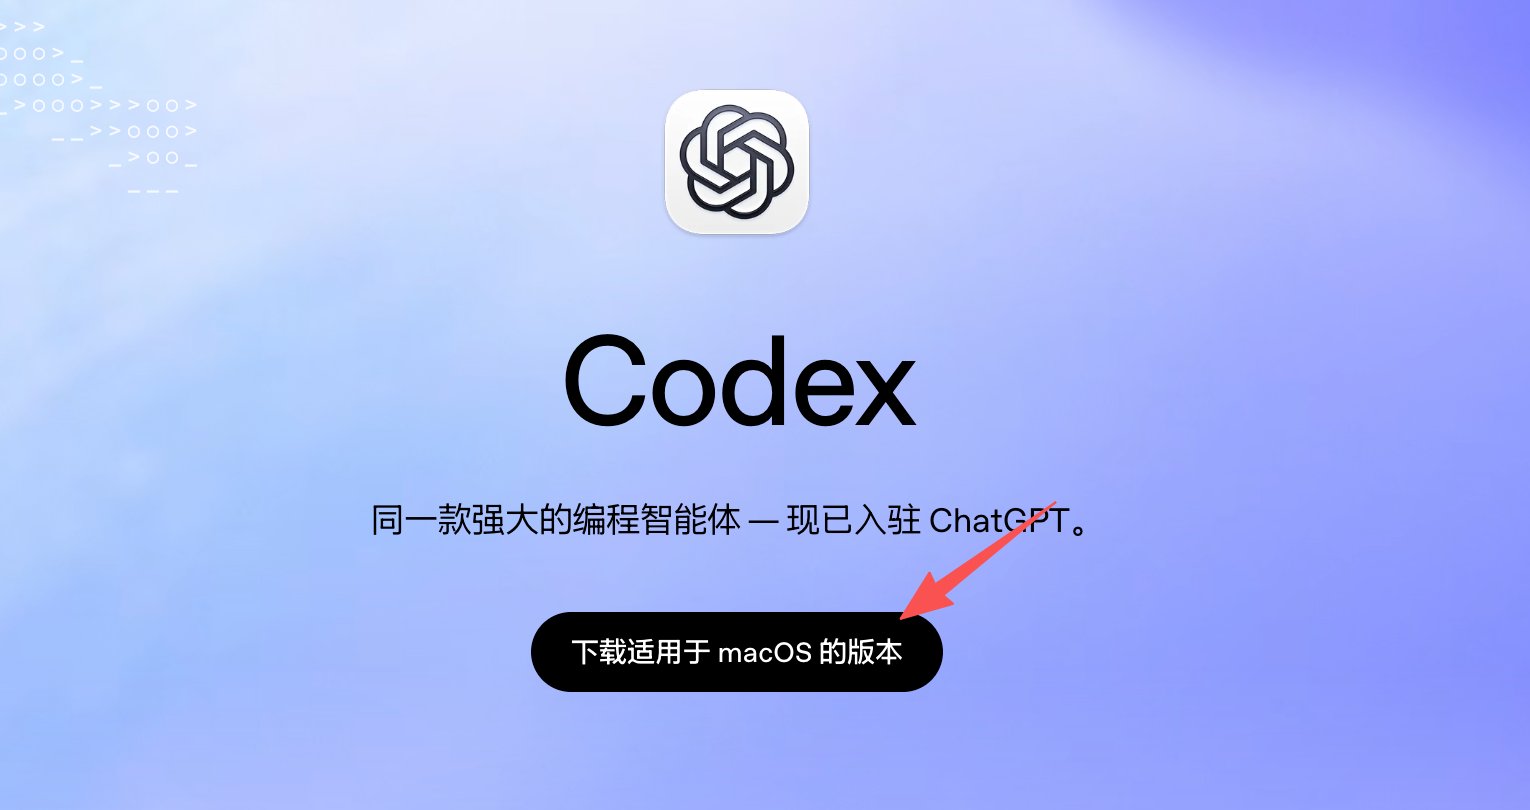
#### 安装Codex客户端

[https://openai.com/zh-Hans-CN/codex/](https://openai.com/zh-Hans-CN/codex/)
<Frame>
  <img src="https://mintcdn.com/docs-api/PwEYLgoL0kxVdcuq/images/image-7.png?fit=max&auto=format&n=PwEYLgoL0kxVdcuq&q=85&s=1d6fec83d3e2f08e0eae443baa700906" alt="Image" width="1530" height="810" data-path="images/image-7.png" />
</Frame>

#### 2.配置Codex 客户端

访问密钥管理页面：[https://fufei.mossx.ai/keys](https://fufei.mossx.ai/keys)

点击 密钥右侧的 使用教程：

<Frame>
  <img src="https://mintcdn.com/docs-api/PwEYLgoL0kxVdcuq/images/image-7.png?fit=max&auto=format&n=PwEYLgoL0kxVdcuq&q=85&s=1d6fec83d3e2f08e0eae443baa700906" alt="Image" width="1530" height="810" data-path="images/image-7.png" />
</Frame>

根据这里的教程，选择对应的平台 会有对应的教程

完全更换 下面两个文件的内容，即可配置完成（其他配置也根据教程来）

* \~/.codex/config.toml
* \~/.codex/auth.json
<Frame>
  <img src="https://mintcdn.com/docs-api/PwEYLgoL0kxVdcuq/images/image-8.png?fit=max&auto=format&n=PwEYLgoL0kxVdcuq&q=85&s=526206138f61ab0ad59ee9b076ffeaf7" alt="Image" width="1188" height="876" data-path="images/image-8.png" />
</Frame>

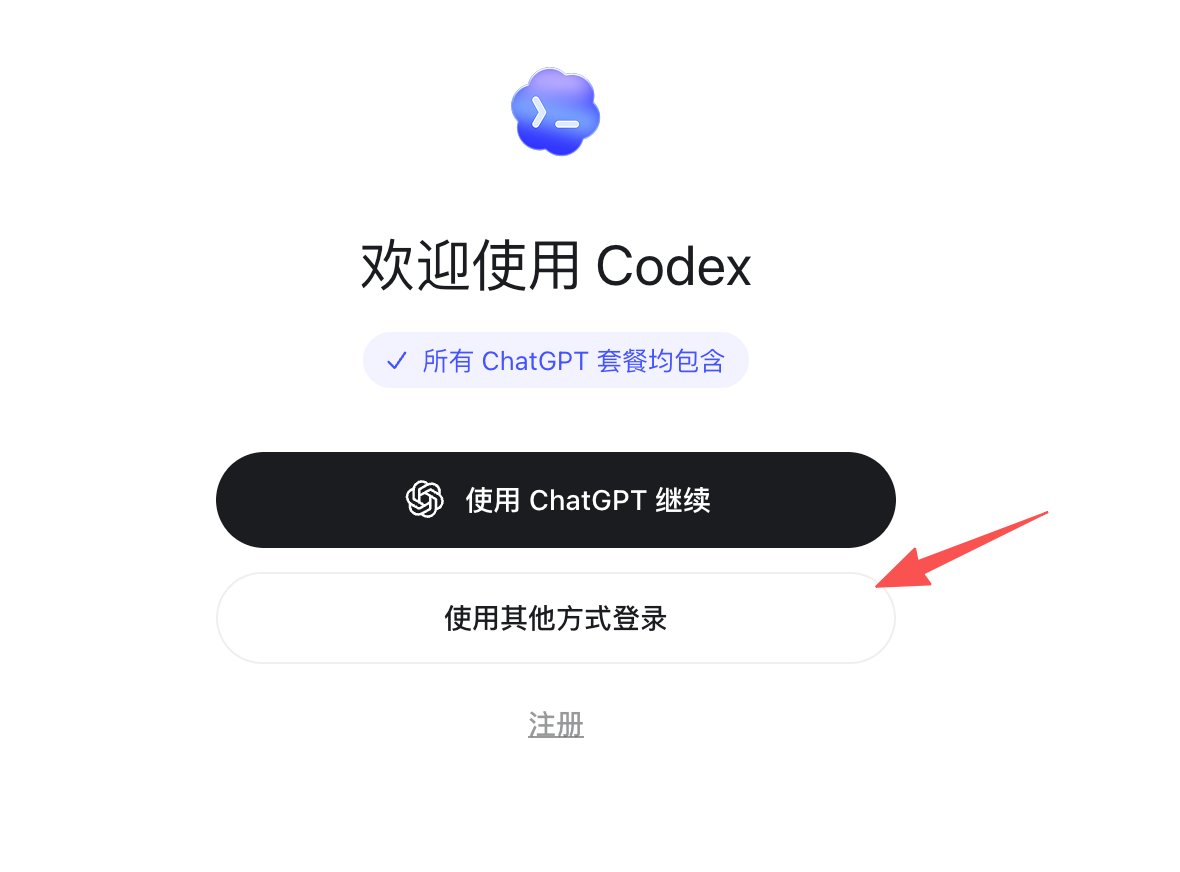
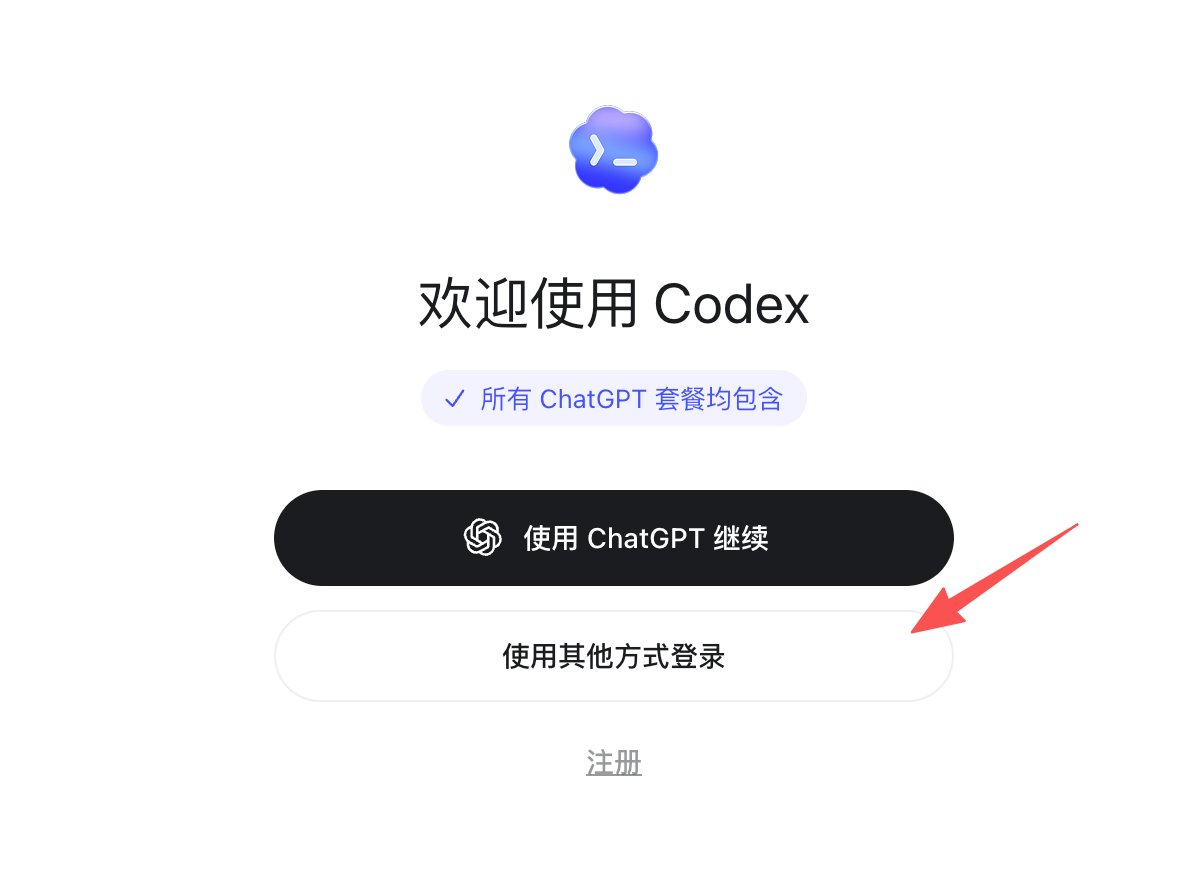
上面步骤完成之后，进入到codex客户端，点击这个使用其他方式登录

<Frame>
  <img src="https://mintcdn.com/docs-api/PwEYLgoL0kxVdcuq/images/ScreenShot_2026-08-21_124747_240.png?fit=max&auto=format&n=PwEYLgoL0kxVdcuq&q=85&s=8a16a81abf50a69e53e8d9230d644c27" alt="Screen Shot 2026 08 21 124747 240" width="1180" height="872" data-path="images/ScreenShot_2026-08-21_124747_240.png" />
</Frame>

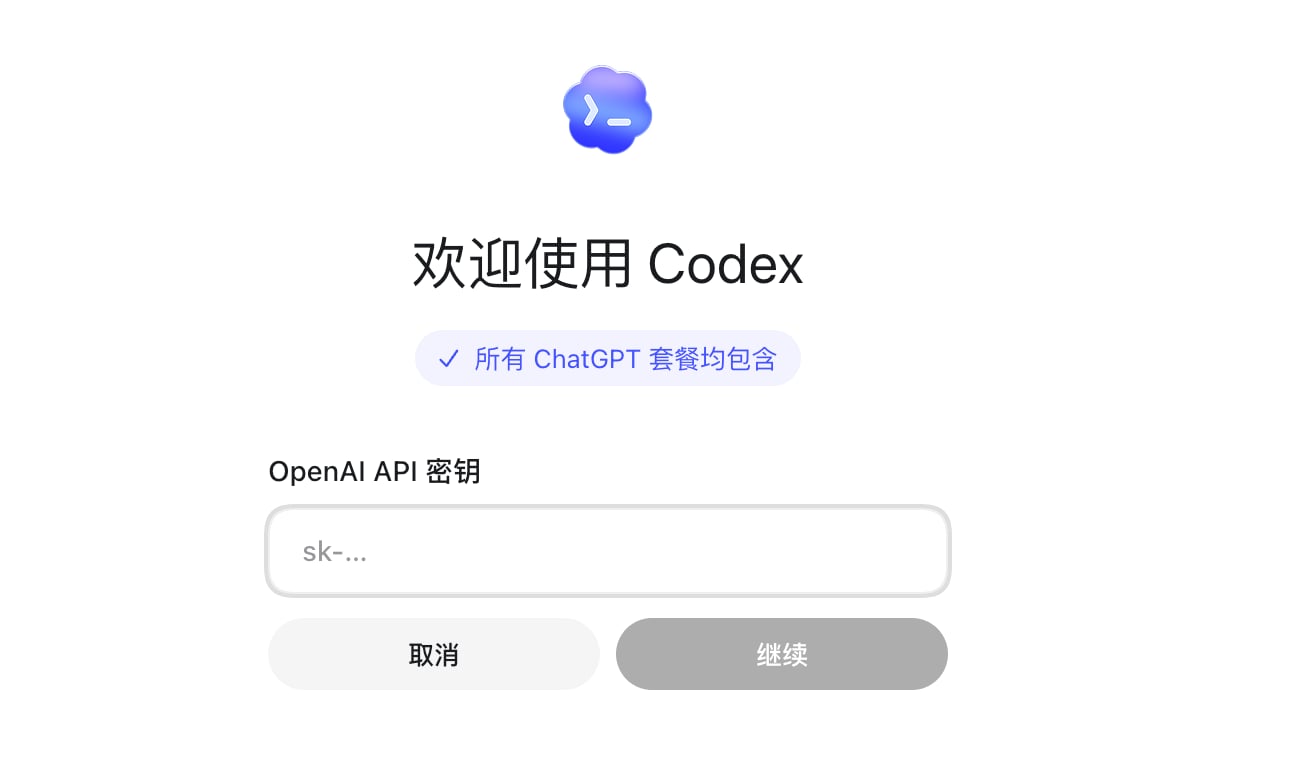
这里的API密钥就是：[https://fufei.mossx.ai/keys](https://fufei.mossx.ai/keys)  这里你创建的密钥，填写进去即可

<Frame>
  <img src="https://mintcdn.com/docs-api/PwEYLgoL0kxVdcuq/images/ScreenShot_2026-08-21_124753_332.png?fit=max&auto=format&n=PwEYLgoL0kxVdcuq&q=85&s=b504e4b6b108841b10bb085e089bf139" alt="Screen Shot 2026 08 21 124753 332" width="1292" height="772" data-path="images/ScreenShot_2026-08-21_124753_332.png" />
</Frame>

<Frame>
  <img src="https://mintcdn.com/docs-api/PwEYLgoL0kxVdcuq/images/ScreenShot_2026-08-21_124920_546.png?fit=max&auto=format&n=PwEYLgoL0kxVdcuq&q=85&s=128000ea943aface69e4bfc47e3ecf58" alt="Screen Shot 2026 08 21 124920 546" width="1572" height="166" data-path="images/ScreenShot_2026-08-21_124920_546.png" />
</Frame>

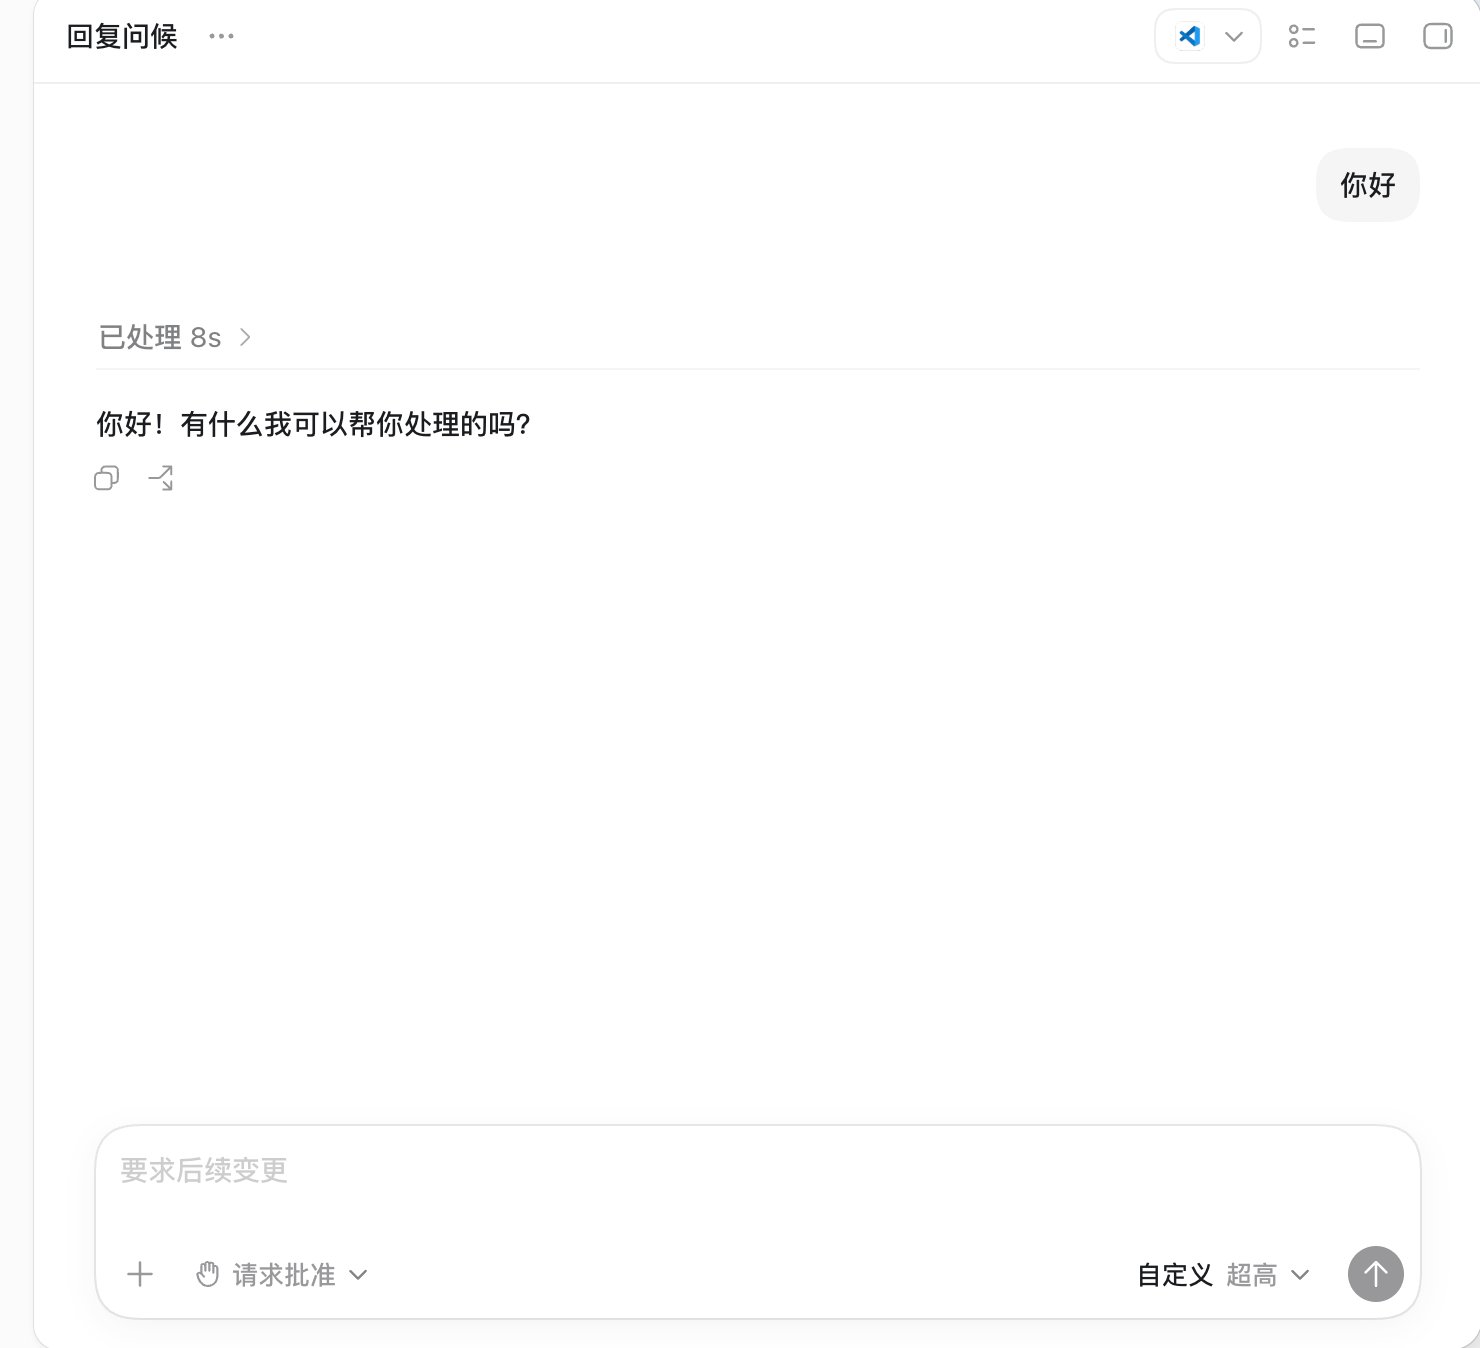
提问测试

<Frame>
  <img src="https://mintcdn.com/docs-api/PwEYLgoL0kxVdcuq/images/ScreenShot_2026-08-21_124954_559.png?fit=max&auto=format&n=PwEYLgoL0kxVdcuq&q=85&s=d35d20c7eeb92c8e4190aa8ac14d08fb" alt="Screen Shot 2026 08 21 124954 559" title="Screen Shot 2026 08 21 124954 559" style={{ width:"69%" }} width="1480" height="1348" data-path="images/ScreenShot_2026-08-21_124954_559.png" />
</Frame>